How to Build Your Personal website with Hugo

Introduction
Building a personal website in an era where dynamic websites were the norm, used to demand a lot of professional skills (such as writing back-end programs, designing front-end user interfaces,, and database management, etc.) .
Various expert technical requirements have increased the barrier to entry for users who want to develop a website.
Static site technology, a substitute approach, is therefore receiving more and more attention. It has less technical requirements(no more back-end or databases stuff), and renders far faster than dynamic websites.
The difficulty of creating websites has further decreased with the introduction of static website generators. With them, website builders only need to focus on creating the website’s content and don’t have to worry about front-end technologies (such as HTML, CSS, and JavaScript).
I’ll use Hugo as our static site generator in the following tutorials, and show you how to develop a simple site with Hugo. The sample site will be deployed to GitHub Pages for public access.
Build Your Site
Prerequisites
This tutorial assumes that you already have:
- an account on GitHub
- installed Git on your system
- installed any editors that support Markdown format(optional)
You can check whether you have git installed by typing git --version.
If your terminal returns a Git version as an output, that confirms you have Git installed on your system.
|
|
Install Hugo
If you are on macOS and using Homebrew, you can install Hugo with the following one-liner; Or download the appropriate version for your platform from Hugo Releases.
|
|
If you are on a Windows machine, you can download the appropriate version for your platform from Hugo Releases.
Type hugo version to verify whether hugo runs correctly
|
|
Create a New Site with Hugo
Firstly, Decide on the location and create a site namedmy-first-website.
|
|
Now, Hugo’s CLI scaffolds created a directory my-first-website with the following elements:
|
|
Add Some Content
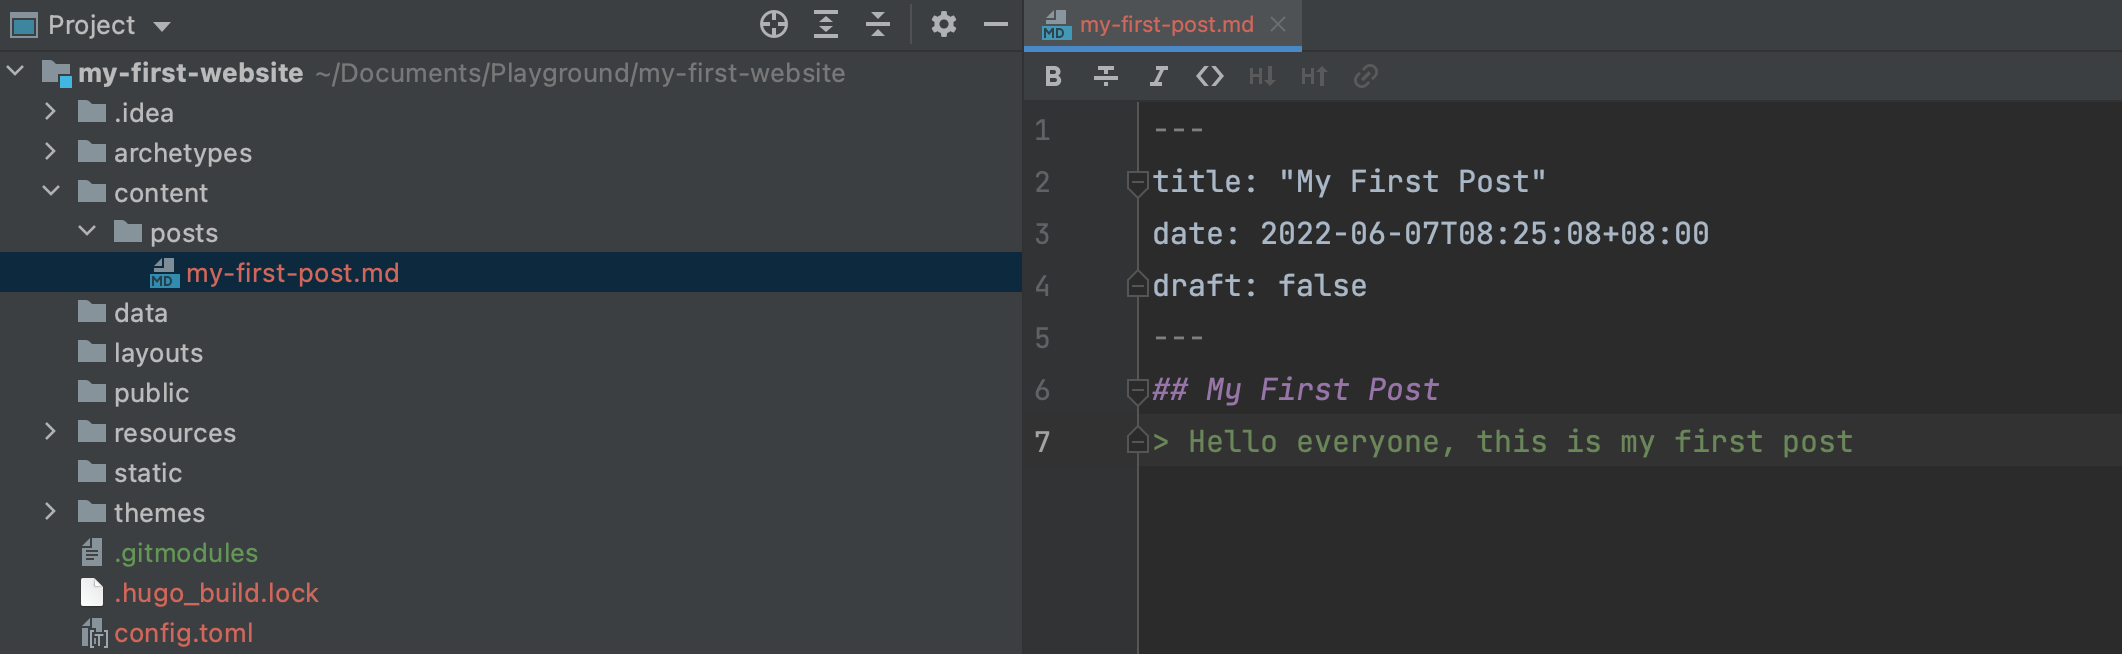
Use hugo new to create a new content file
|
|
Then we add some content to this file
|
|
Choose a Theme
Once finishing adding content,we need to choose a theme to tell Hugo how to render our Markdown files to web pages we can see from a browser.
This tutorial uses the Ananke Theme.
First, download the theme from GitHub and add it to your site’s themes directory:
|
|
Then, add the theme to the site configuration:
|
|
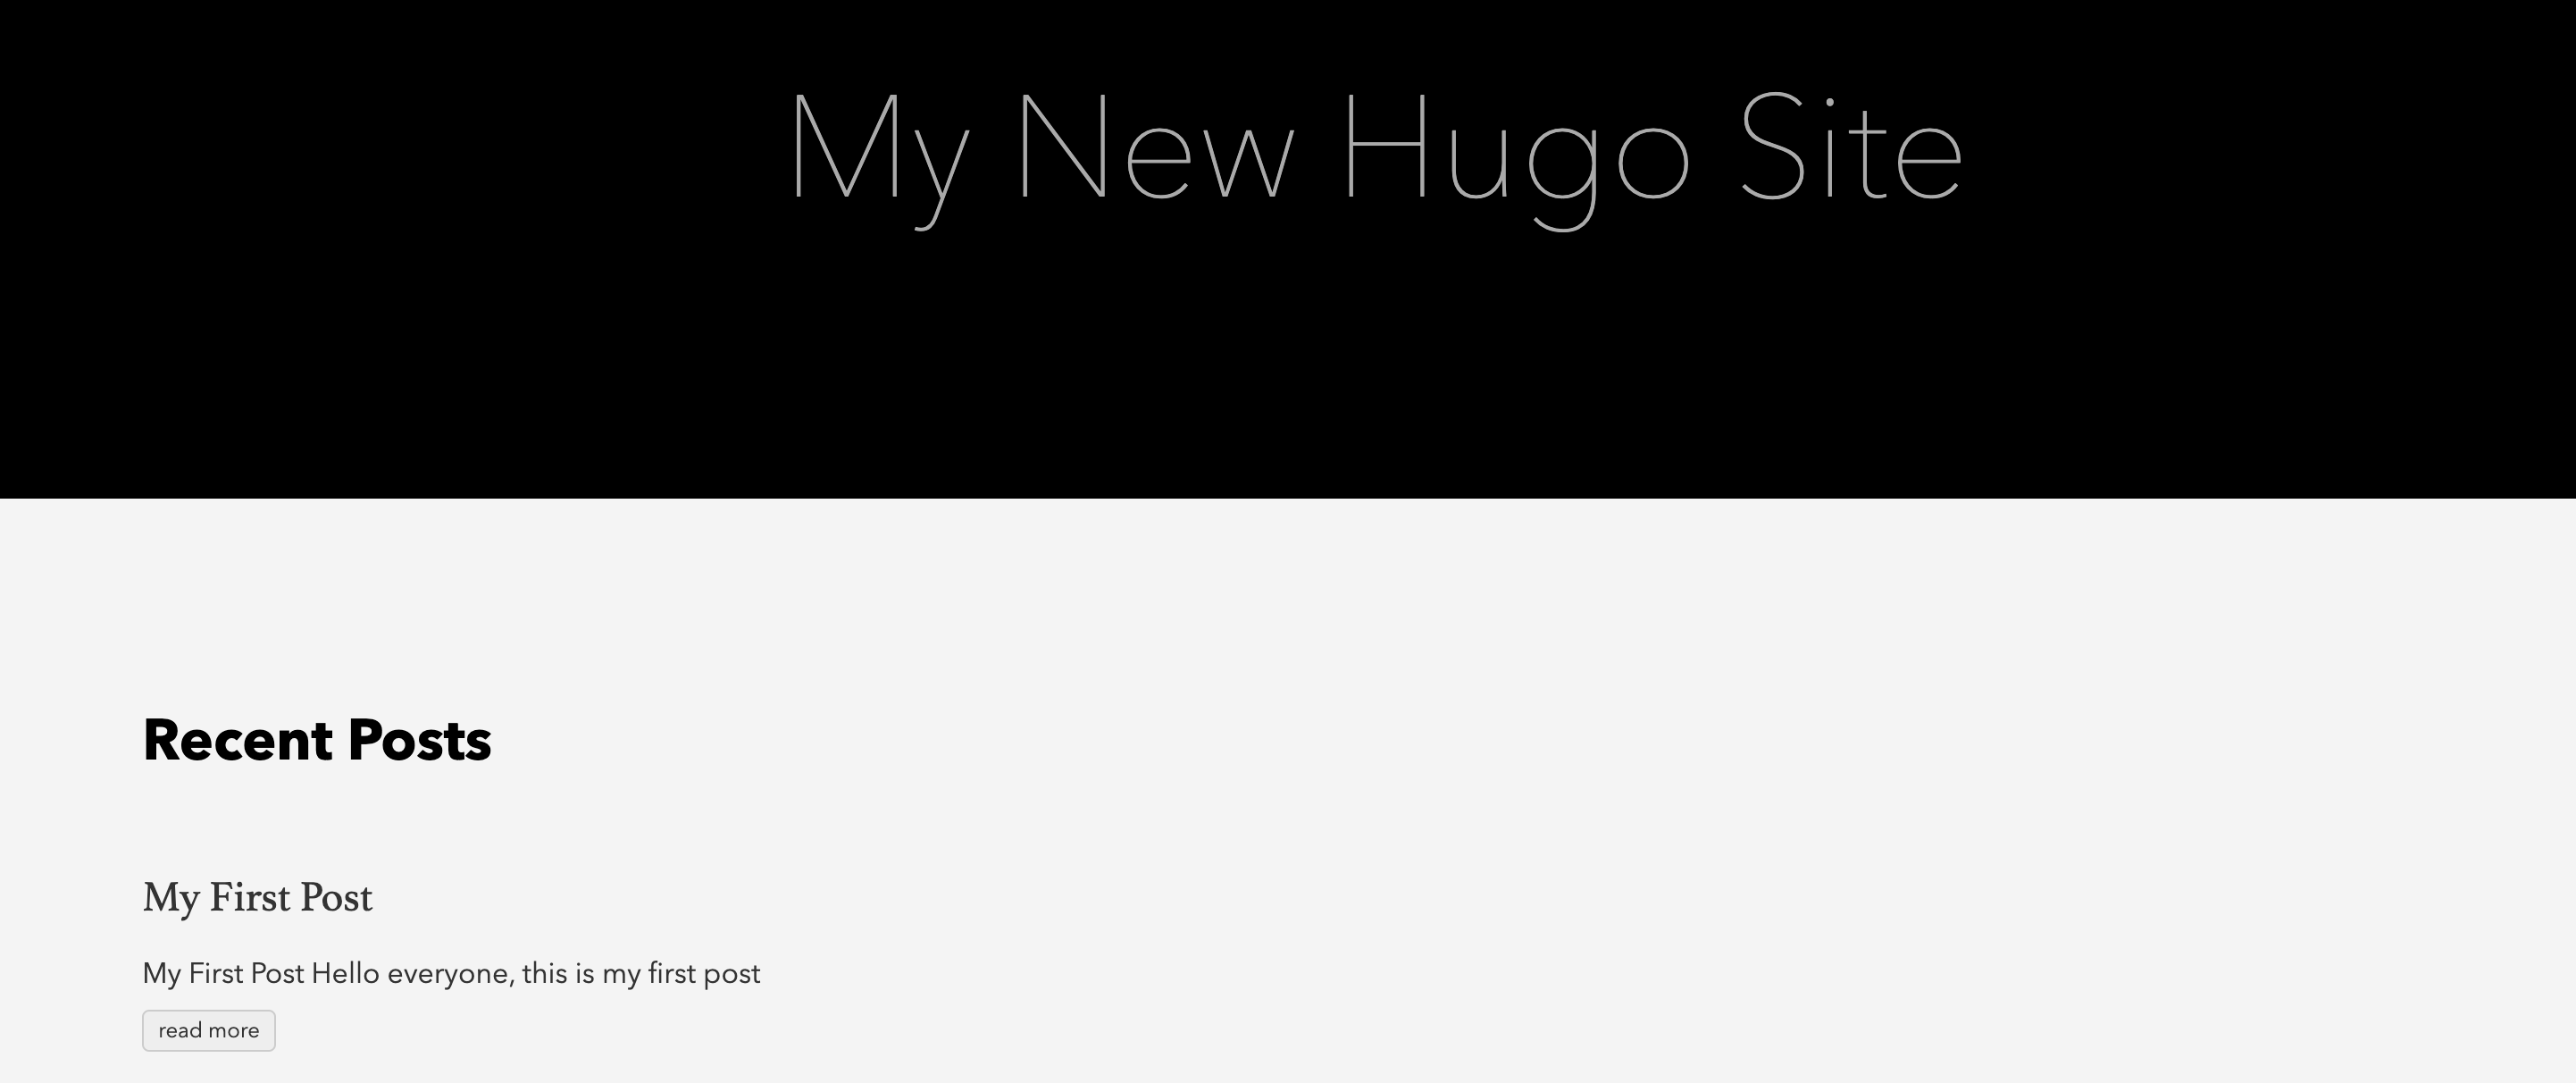
Start the Hugo server
Now, start the Hugo server to see your website.
|
|
Access to your new site at http://localhost:1313/.
Set the BaseURL
Before deploying our site on GitHub pages, we update the baseURL in config.toml.
|
|
Generate static pages
Output pages will be in ./public/ directory by default. We set the publishDir to ./docs to change the output directory.
|
|
Deploy Your Site on GitHub Pages
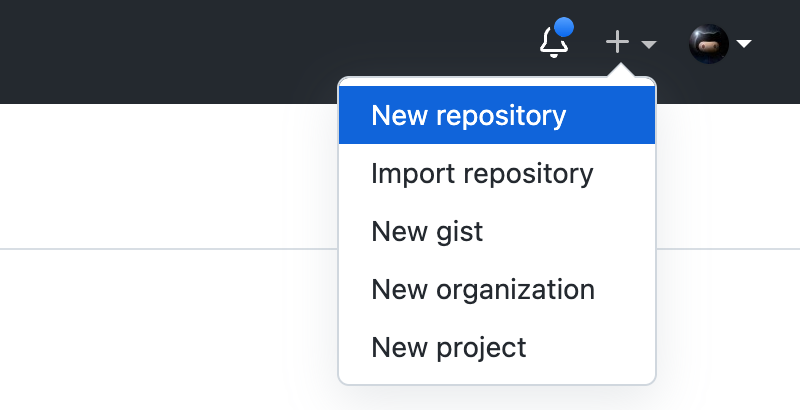
Create a GitHub Repository
First,click + to create a new repository
Name the repository my-first-website without creating a README file.
public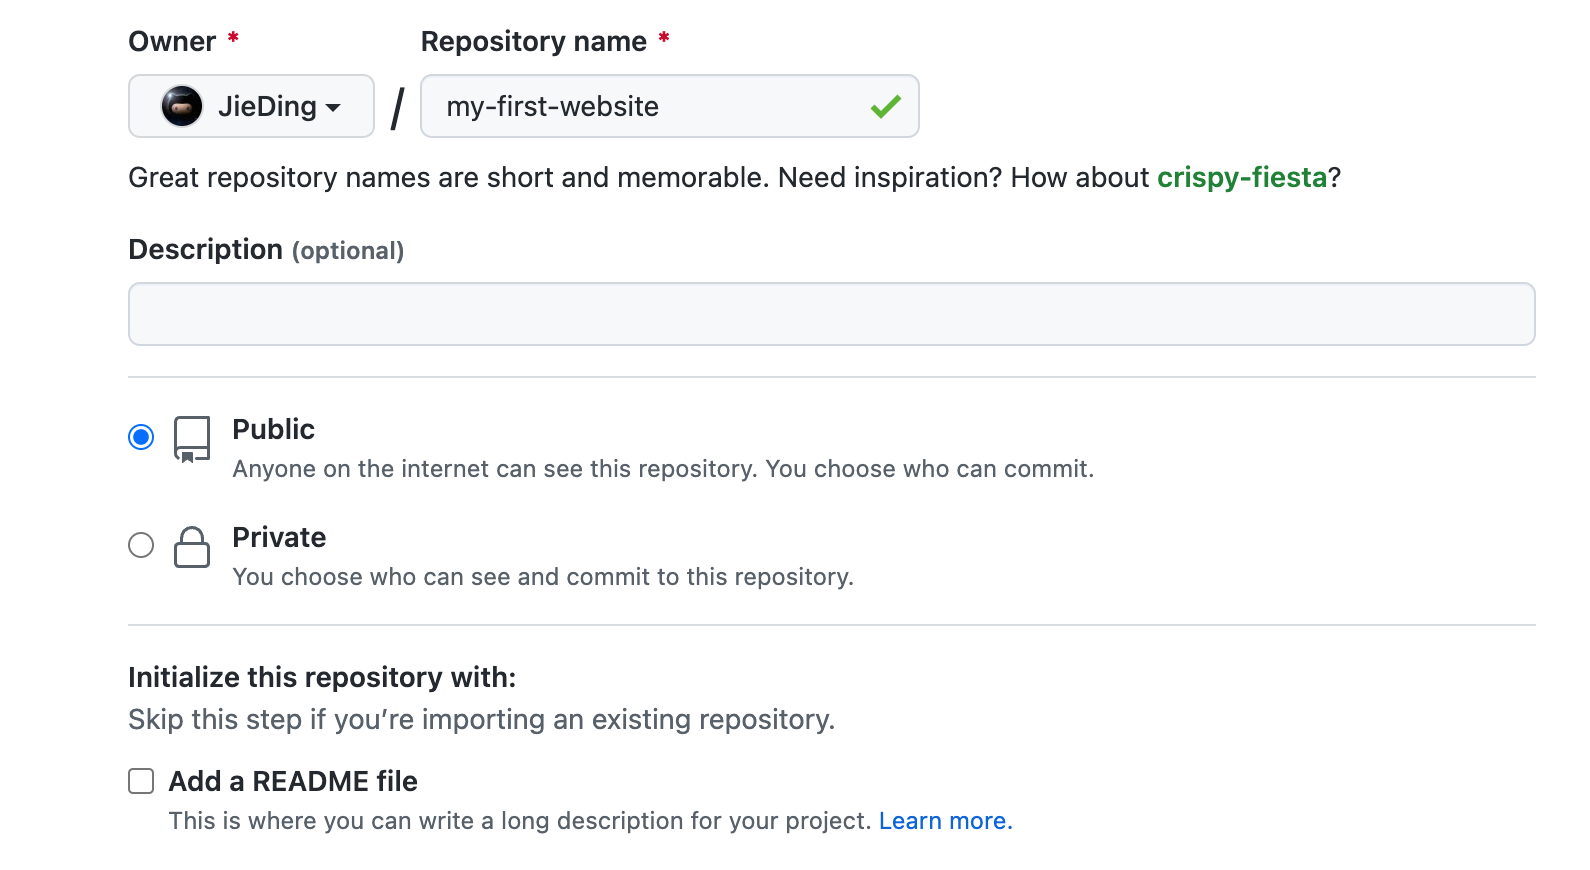
Now, we copy the URL (Starting with git@).
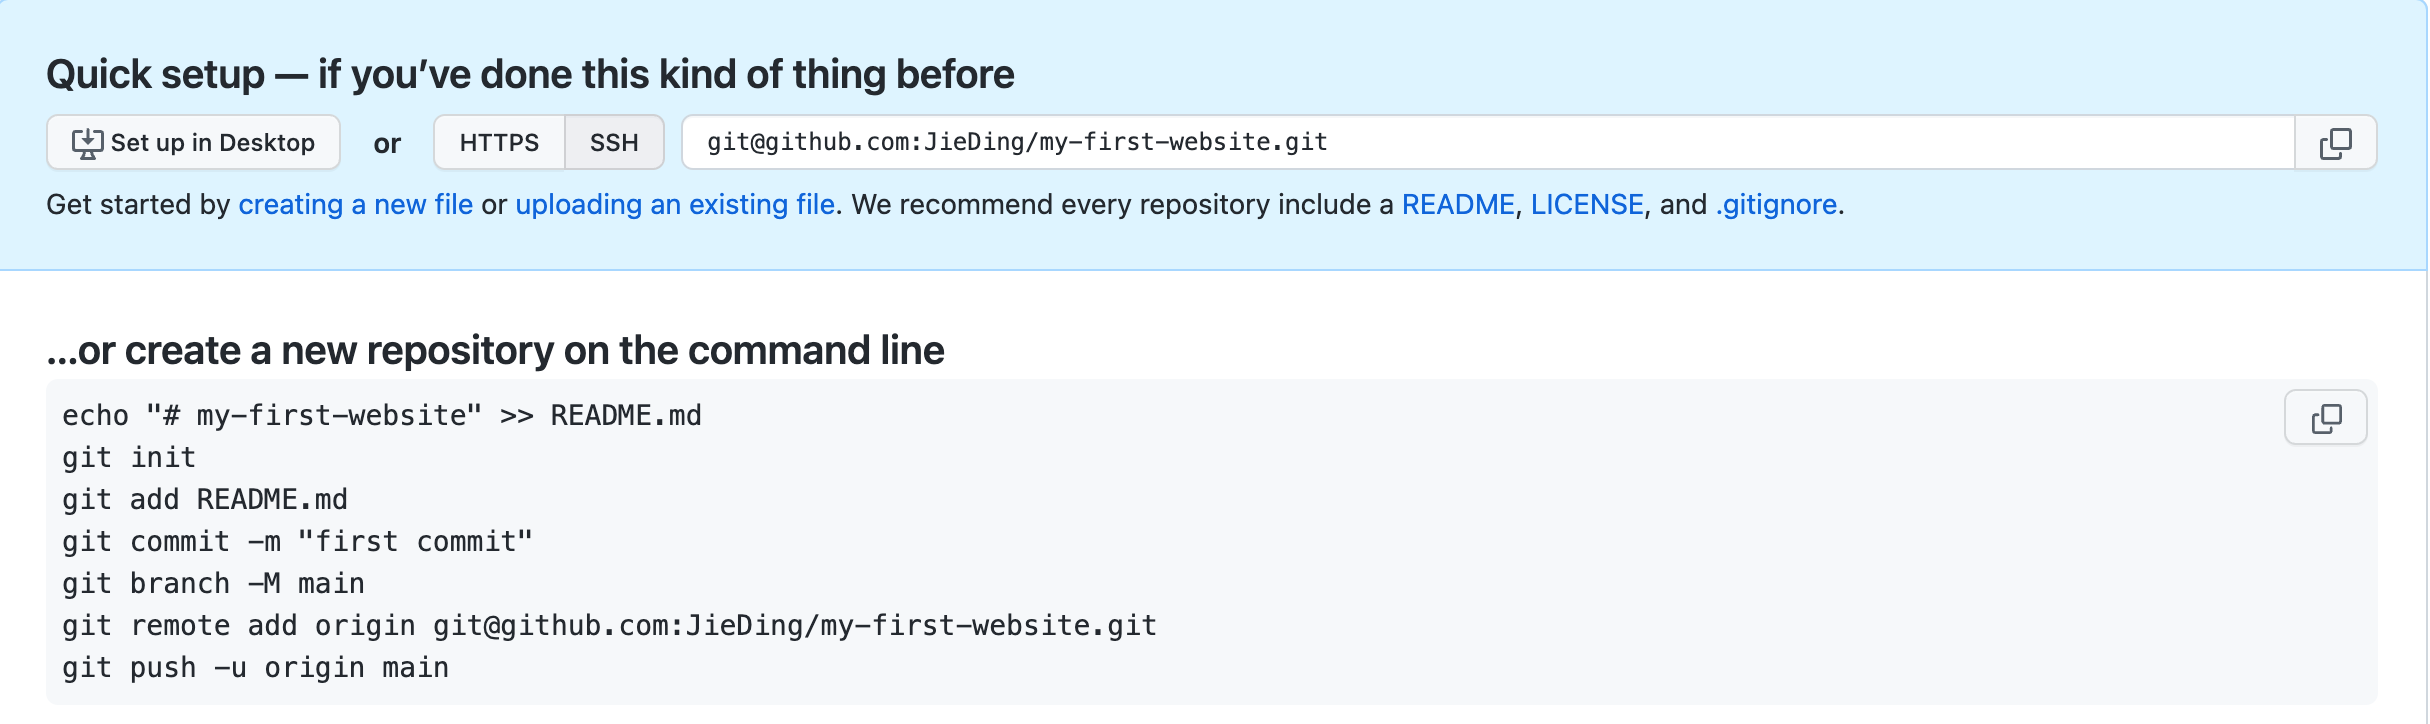
Push Your Site to the New Created Repository
|
|
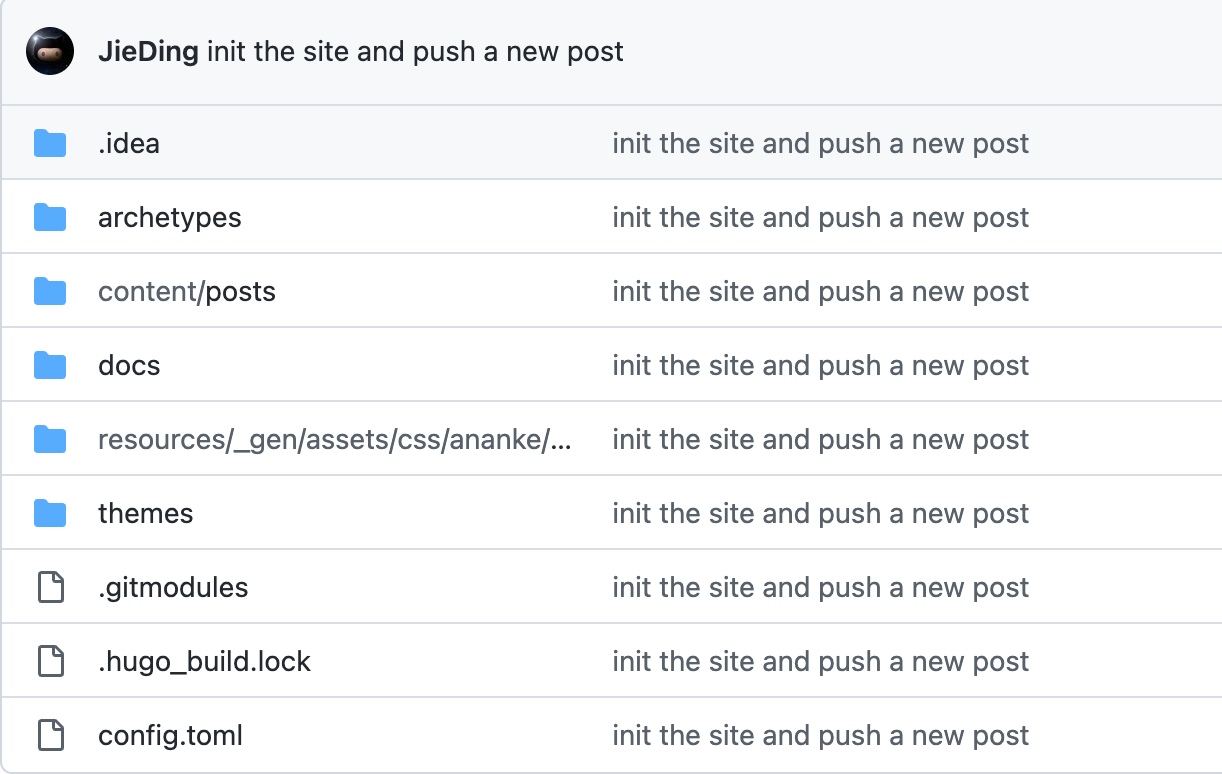
Your repository should look like this, if you pushed your site successfully.
Configure GitHub Pages
Click Settings->Pages to configure your site on GitHub pages.
Then, choose branch main and docs as sources. Save the configuration to automatically deploy your site.
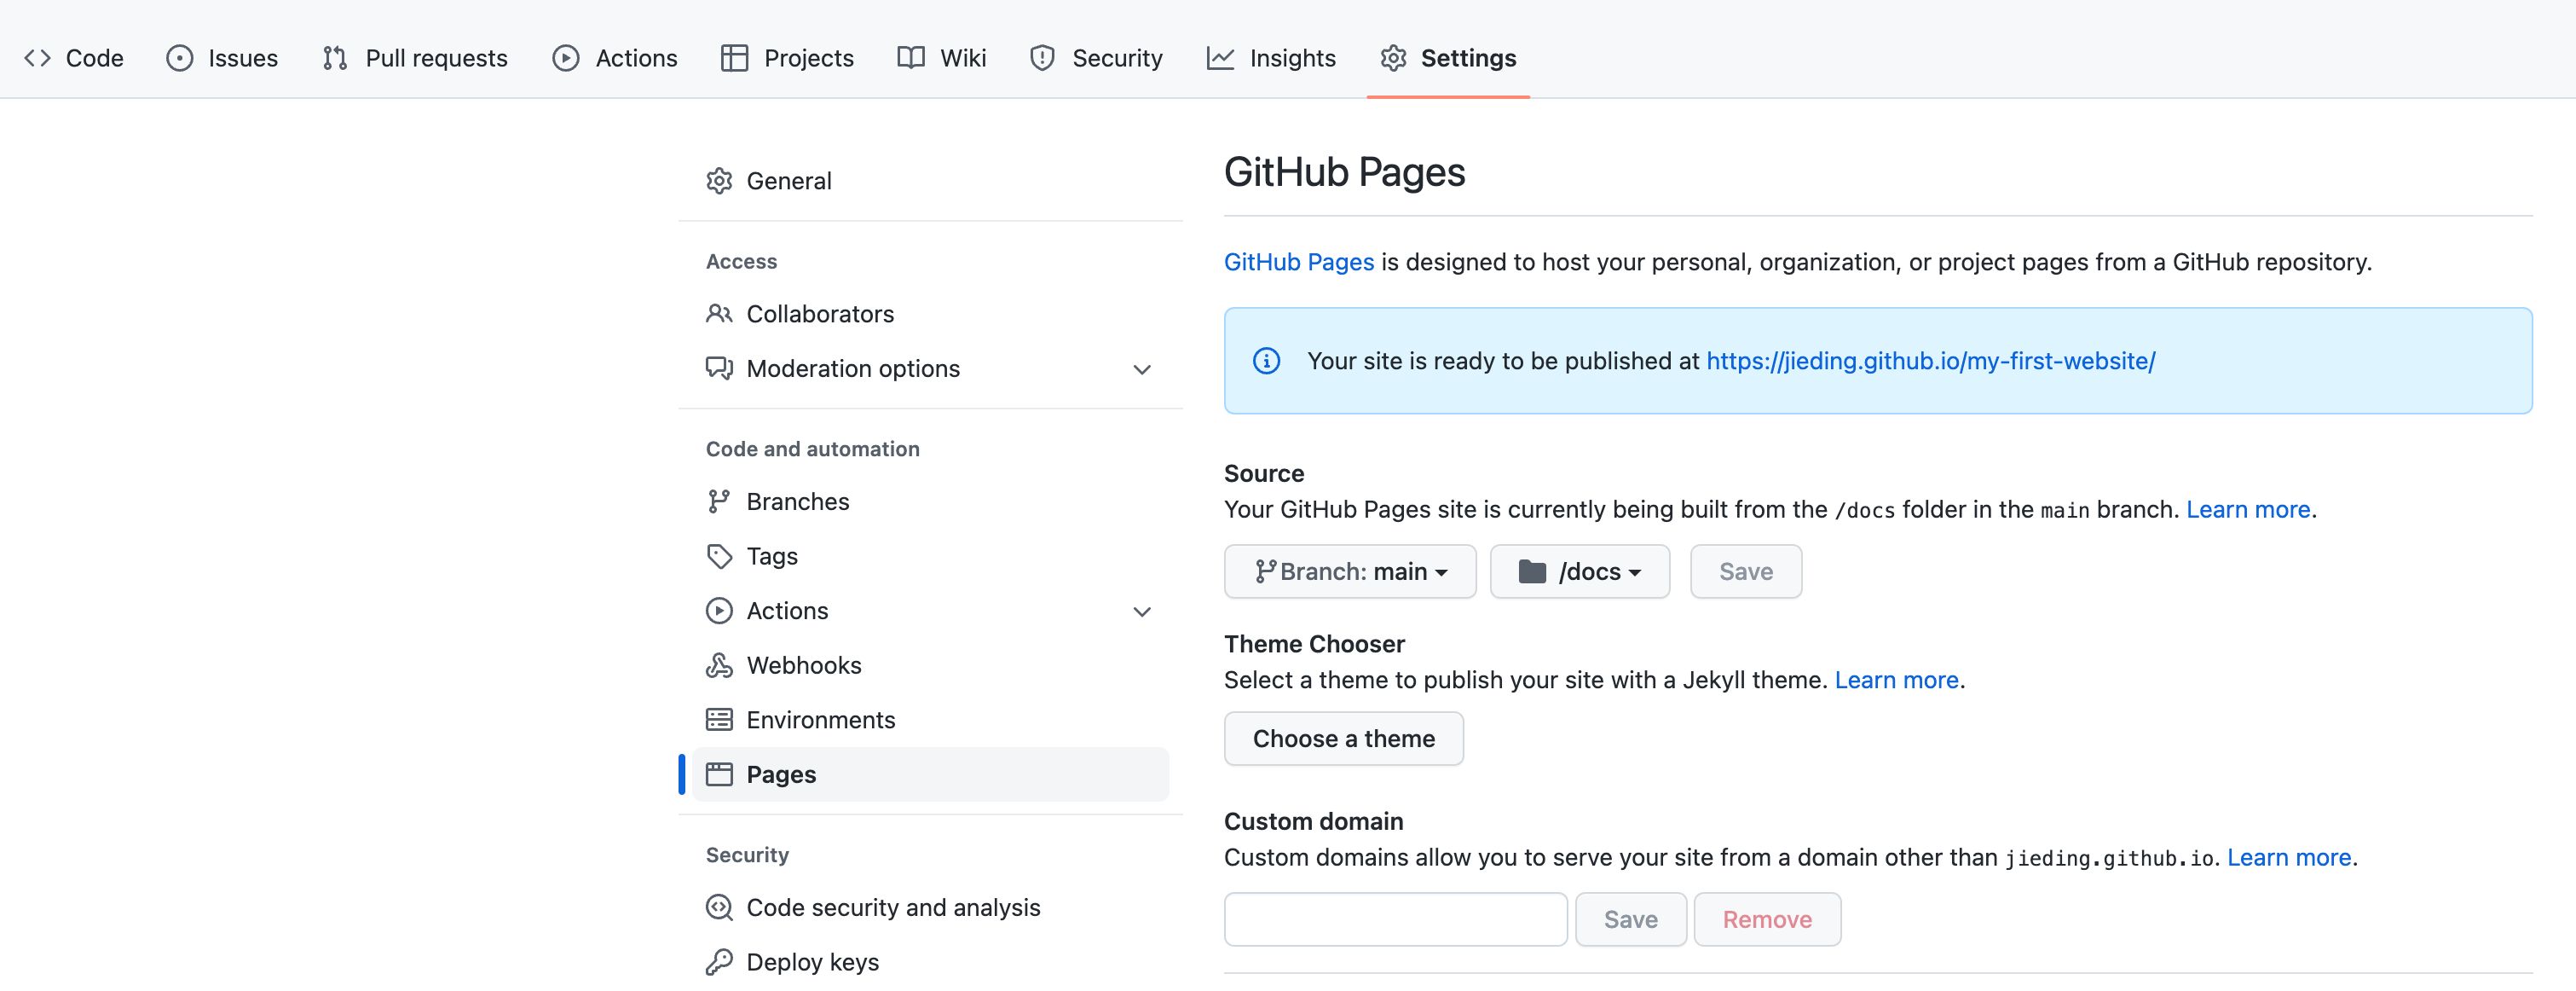
Access Your Site on GitHub Pages
Finally, we can access the site at https://username.github.io/my-first-website/.